Web Administration Dashboard - Developer's Guide
From RifidiWiki
This document details the steps necessary to set up a development environment in order to modify Web Administration Dashboard.
Contents
Development tools
In developing this responsive html5 web application, we leverage on these technologies:
Npm
A package manager for javascript
To install it, go to https://www.npmjs.com/package/npm
Yeoman
The web's scaffolding tool for modern web applications
To install it, go to http://yeoman.io/
Node JS
A platform built on Chrome's JavaScript runtime for building network applications
To install it, go to https://nodejs.org/
Grunt
A JavaScript task runner
To install it, go to http://gruntjs.com/
Bower
A package manager for the web
To install it, go to http://bower.io/
Bootstrap
HTML, CSS, and JS framework for developing responsive, mobile first projects on the web
Documentation available on web site http://getbootstrap.com/
Angular JS
HTML enhanced for web apps
Documentation available on web site https://angularjs.org/
Angular Modules
Find modules for AngularJS
Modules available on web site http://ngmodules.org/
Angular UI
Companion suite(s) to the AngularJS framework
Modules available on web site https://angular-ui.github.io/
WebStorm
A lightweight IDE for client-side development and server-side development with Node.js
Product available on web site, according to appropriate license https://www.jetbrains.com/webstorm/
Configuring environment
- Setup Edge Server Development Environment, as source code for web administration dashboard is located in folder Rifidi-SDK / RifidiHome / admin
- Download and install Npm
- Download and install Yeoman
- Download and install NodeJS
- Download and install Grunt
- Download and install Bower
- Download an appropriate license of WebStorm, or use another JavaScript IDE
- Open the project source code in IDE.

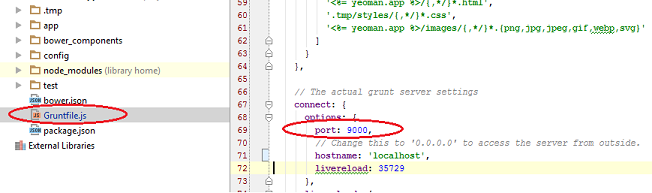
- Inside Gruntfile.js project file, set the appropriate port number for nodejs development server to run
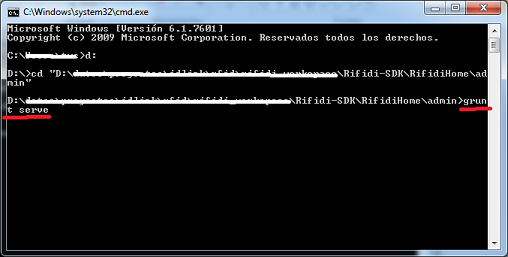
- Open an operating system command console and locate the root of web app source code, where the Gruntfile.js file is located.

- Start the development nodejs web server by running grunt serve command
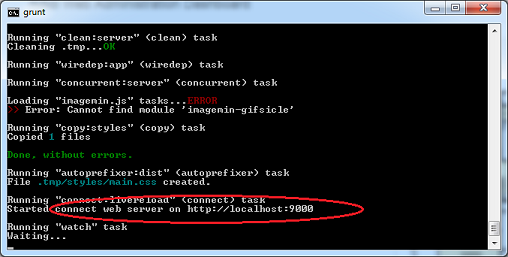
- Ensure the server is successfully started by looking at console message
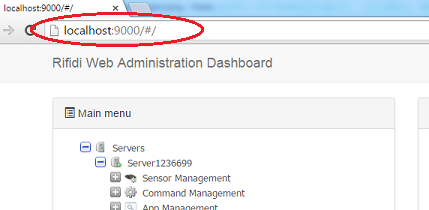
- It automatically opens the default web browser pointing to web application
- Enjoy coding!


