Prototyper User's Guide
From RifidiWiki
Contents
What is Prototyper
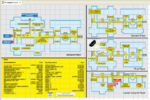
Prototyper is an RFID demo tool based on Rifidi Emulator. Emulated readers may be created and placed on a blueprint representation of a factory or warehouse, and various items can be created and dragged into and out of RFID "hotspots".
This will allow you to test workflows and business logic quite easily, without the need for expensive hardware setups. Any problem in the process can be identified and corrected sooner because of this.
Getting Started
Note: Tested to work with Java 1.7 or earlier. Noticed some issues with Java 1.8 Download Rifidi Prototyper at https://sourceforge.net/projects/rifidi/files/.
Install it to your desired directory, and run the executable. You should see something like this:
Creating a project
Now we must create a project.
- Click on "File" and then "New Prototype".
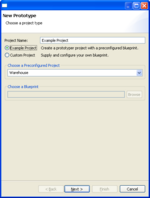
- You can choose to do a custom project, or you can pick from a list of pre-configured projects. Either is fine for now, but if you want to use your own blueprint image file you will have to choose "custom project".
- After you have chosen, give your project a name and click "next".
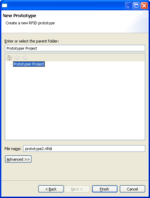
- You must now select the parent folder for your project. Selecting the default "Prototyper Project" will be fine for now.
- Give your project a filename and press "Finish".
Note: To use a prototyper file created outside prototyper you need to place the file in the following directory prior to launching prototyper
RifidiPrototyper-1.0beta\workspace\Prototyper Project\
This is the case with the northwind_prototyper_file.rifidi that comes with Northwind
The Reader View
The top left portion of the screen should look very familiar to anyone who has used the Rifidi Emulator tool. Here, you will create emulated readers which can be used to create RFID hotspots on the blueprint.
To create a reader, click on the "+" icon at the top of the screen, and follow the Reader Creation Wizard. For more instructions on the Reader Creation Wizard, go here. If you don't know which reader to create, try creating an Alien ALR 9800 with the maximum number of antennas.
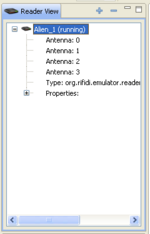
Once the reader has been created, click the "+" next to it. You can now see all the antennas that the reader has:
These antennas can be used to create hotspots. Try this now by clicking on an antenna and dragging it onto the blueprint. A "hotspot" icon should appear, which can be resized and re-positioned. Adjust the size of the hotspot to the scale you want, and drag it to the place you want it in the blueprint (say, monitoring a doorway or portal). You can create a hotspot for every antenna of every reader you create, and all can be adjusted in size and position.
Now that the hotspots are created, sized, and positioned, you need to turn on the reader, to make sure they are reading. Right click on the reader you created, and press "Start Reader". When you do this, the hotspots for that particular reader will change to show waves in front of them, as such:
This shows that they are on and ready to read any tags which enter their threshold.
The Items View
Readers are only one piece of the RFID puzzle, the other are tagged items. The items view can help you render physical items which have tags attached to them. After they are created, they can be resized and moved around, just like hotspots are moved around.
However, before we create any tagged items, we should switch the main view off of "Edit Mode". This will allow us to resize and move around tagged items at will. To do this, click anywhere on the blueprint and press the "Edit Mode" button at the top left:
After you press that, the grid around the map should disappear, and you will be able to move tagged items (which we are about to create) around the blueprint.
Creating items
Now we will create an item. This is done by clicking on the "Add New Items" icon at the left side of the screen:
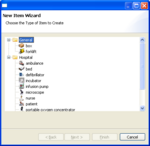
A wizard will then pop up, which looks like this:
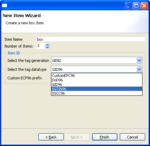
These are all the tagged items that you can create. For the purposes of this tutorial I am going to create the "box" item, which can represent any kind of box (or whatever else you want it to represent). Click on the "box", and then click "next". The next screen looks like this:
Choose the name you want for the item, the number of items you want to generate, and the generation/datatype of the tags that will be generated. You can also choose a custom prefix for your tags if you want. After you are done choosing your options, click "finish".
Adding Items to the Map
You can add items you have created in the item view to the main view by clicking and dragging them onto the blueprint. Click on the box or boxes that you have created and drag them onto the map. They should show up like this:
You can resize them or move them around (as long as you aren't in edit mode) just like your hotspots. Now try dragging the box onto a hotspot:
As long as the reader is on, you will receive a notice that a box has been added to the antenna of the reader that you dragged the box onto. Dragging the box off of the hotspot will give a remove event:
Adding Custom Items
For adding your own items please refer to this thread for steps http://forums.rifidi.net/viewtopic.php?f=41&t=831
Conclusion
You now have a pretty good idea of how Rifidi Prototyper works. It is based on and very similar to Rifidi Emulator, but it gives a much better visual representation of how your RFID system will work. Using Prototyper, you can track a box through your production chain and make sure your software is working correctly.
