Web Administration Dashboard
From RifidiWiki
Introduction
The Web Administration Dashboard enables users to manage, monitor and configure Rifidi Servers and Applications.
Go to http://localhost:8111/dashboard


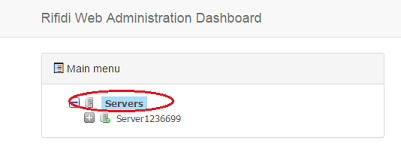
Menu section
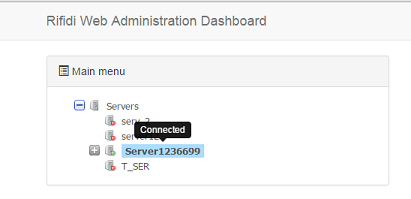
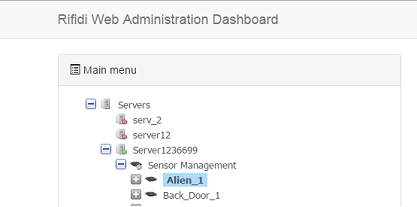
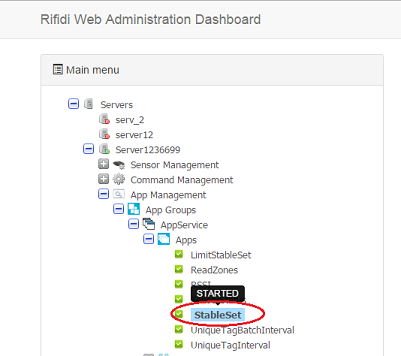
The menu is a hierarchical tree component, where all the configured servers are listed, and under each server there are three fixed sections:
- Sensor Management: Allows operations related to sensors, such as listing sensors, create a new sensor connection, modify sensor properties, associate sessions to sensors Include All "session" commands (for stopping and starting reader/sensor sessions), ExecuteCommand and deleteCommand (for commands supported by a sensor such as a tag read), Readers (for getting a list of readers/sensors available on Edge Server instance), Get and Set Properties (for setting and getting sensor properties), Create Reader (for creating a new reader connection)
- Command Management: Allows
- App Management
Facility floor plan section
It will be available in a future release
Wizard section
When there is the need to create a component by using a wizard, it is displayed in wizard section.
Properties editor section
When a tree element is selected then its properties are displayed in this section, offering the possibility to read or modify them
Server Management
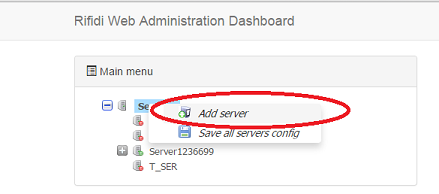
Add Server
- Right click on 'Servers' node and then choose 'Add server'
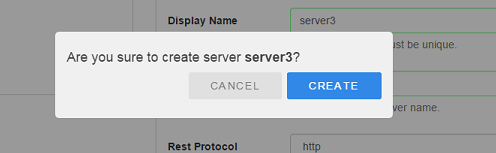
- Provide the values for attributes: Display name, IP address, protocol and port where rest services are deployed on that server.
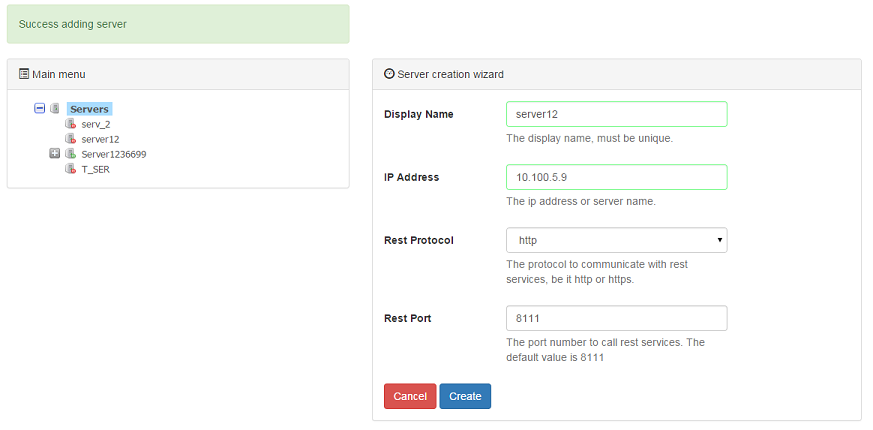
- Click on 'Create' button and confirm


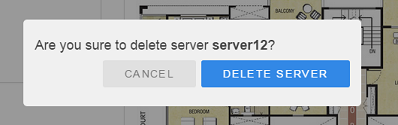
Delete Server
- Right click on server node to delete and then choose 'Delete server'
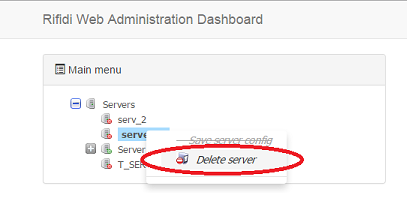
- Confirm delete operation


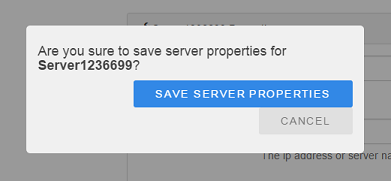
Update Server Connection Properties
- Click on server node to modify and then go to properties editor area
- Provide the values for attributes: Display name, IP address, protocol and port where rest services are deployed on that server.
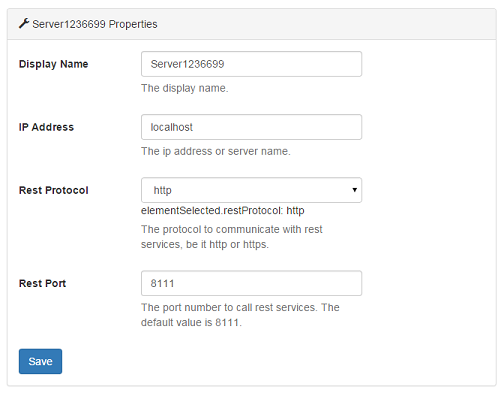
- Click on 'Save' button and confirm


Update Server Auto Refresh settings
Enables or disables the menu auto refresh feature, so web app periodically synchronizes with server to reflect actual state of elements
- Click on servers node and then go to properties editor area
- Provide the values for attributes: Enable auto refresh and auto refresh delay.
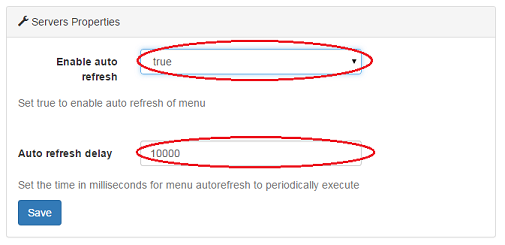
- Click on 'Save' button and confirm


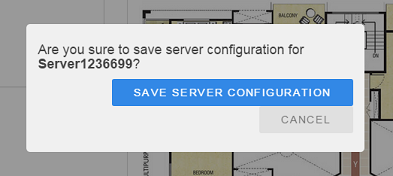
Save Server Configuration
- Right click on server node and then choose 'Save server config'
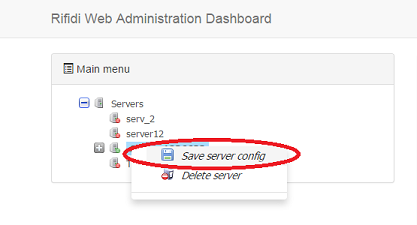
- Confirm the save operation


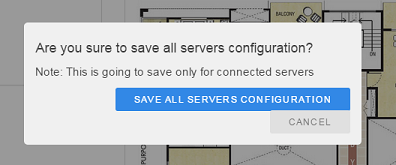
Save all servers Configuration
- Right click on "Servers" node and then choose 'Save all servers config'
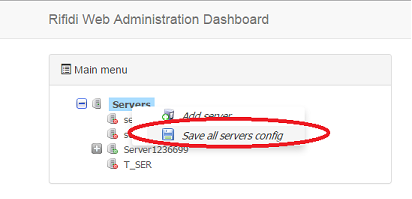
- Confirm the save operation


Sensor Management
Sensor
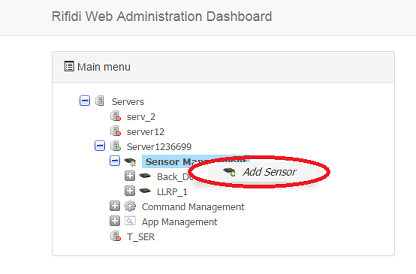
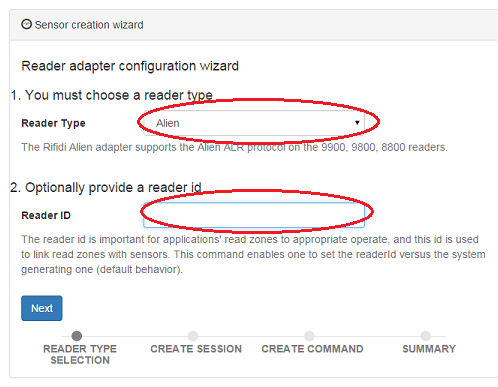
Add Sensor Wizard
Steps user through creating sensor, session and command (where applicable).
- Right click on 'Sensor Management' node and then choose 'Add Sensor'
- Choose the sensor type and optionally provide the reader id and click Next
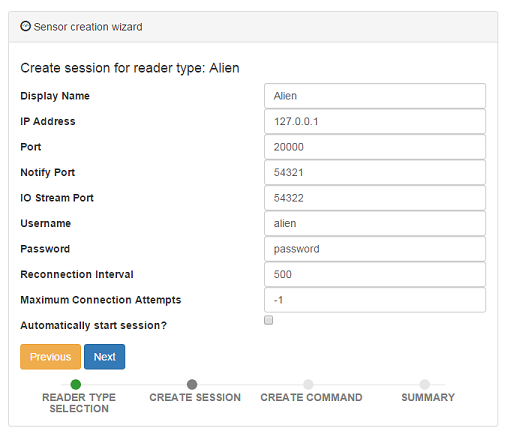
- Set the connection properties for sensor and optionally check if automatically start session, and click Next
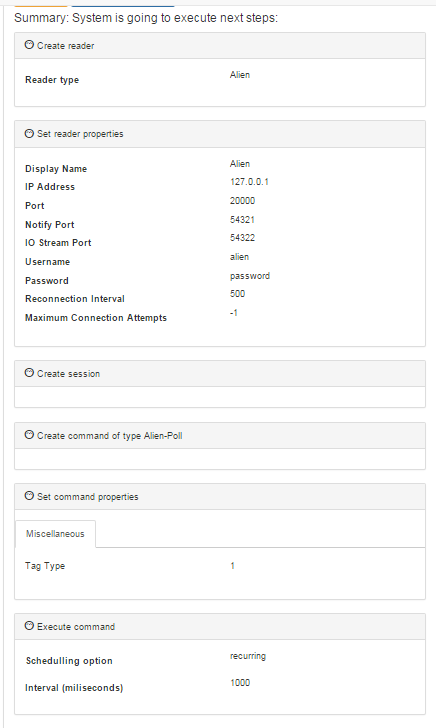
- Create the command for sensor, choose the command type and choose to create a new command instance or select an existing one, set the properties for command instance and set the scheduling options for executing command, and click Next

- Review steps summary and confirm


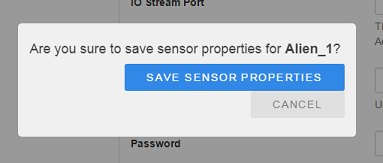
Updated Sensor Properties
- Click on sensor node to modify and then go to properties editor area
- Provide the values for sensor attributes
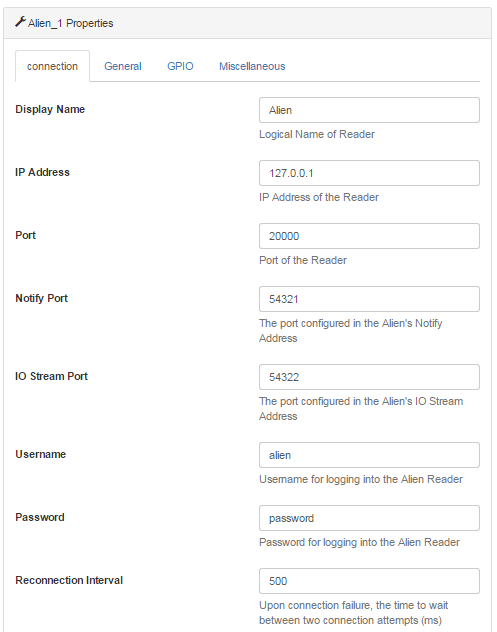
- Click on 'Save sensor properties' button and confirm


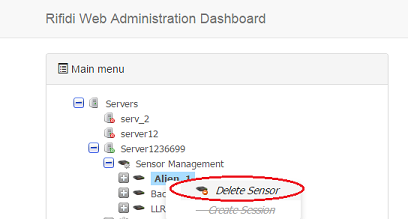
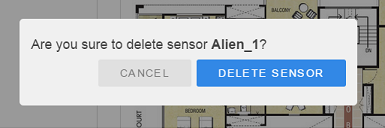
Delete Sensor
- Right click on sensor node to delete and then choose 'Delete Sensor'
- Confirm delete operation


Session
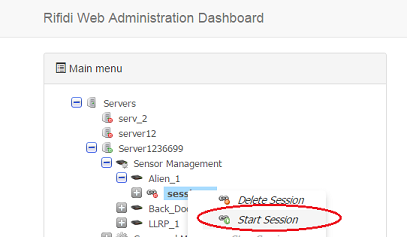
Start Session
- Click on session node to start and then click on 'Start Session'

Stop Session
- Click on session node to stop and then click on 'Stop Session'


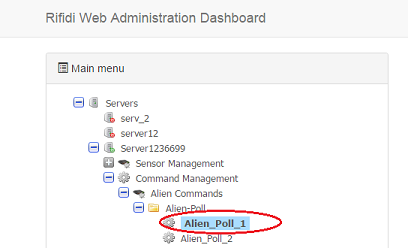
Commands
Updated Command properties
- Click on command instance node to modify and then go to properties editor area
- Provide the values for command attributes
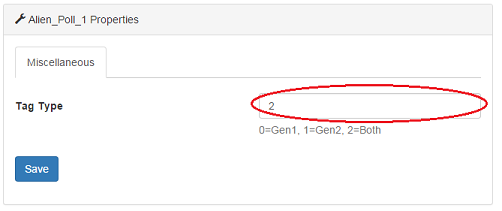
- Click on 'Save' button and confirm


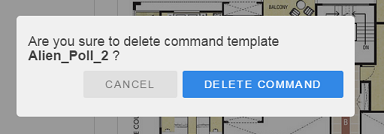
Deleted Command
- Right click on command node to delete and then choose 'Delete Command Template'
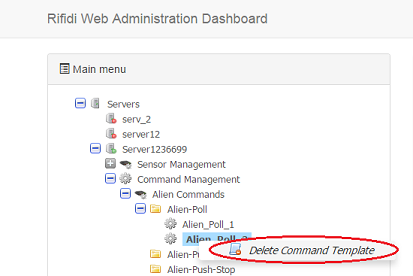
- Confirm delete operation


Create Command
- Right click on command type node, select 'Create Command Template' and then go to properties editor area
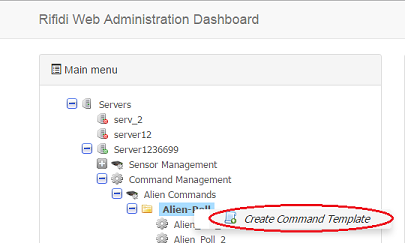
- Provide the values for command attributes
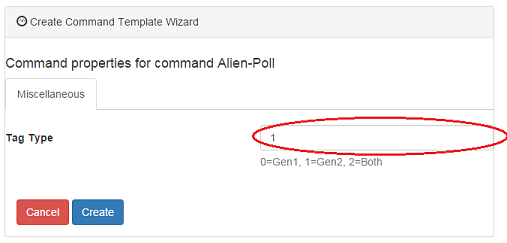
- Click on 'Create' button and confirm


Execute Command
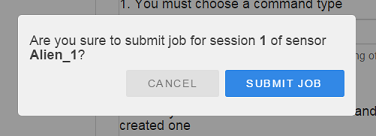
- Right click on session element where you want to submit the job and then choose 'Submit Job'
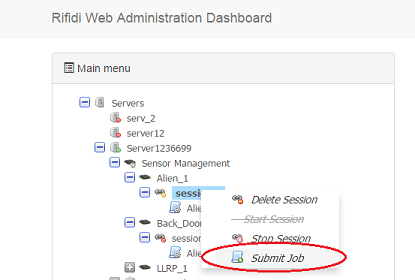
- Choose the command type and choose to create a new command instance or select an existing one, set the properties for command instance and set the scheduling options for executing command, and click Submit
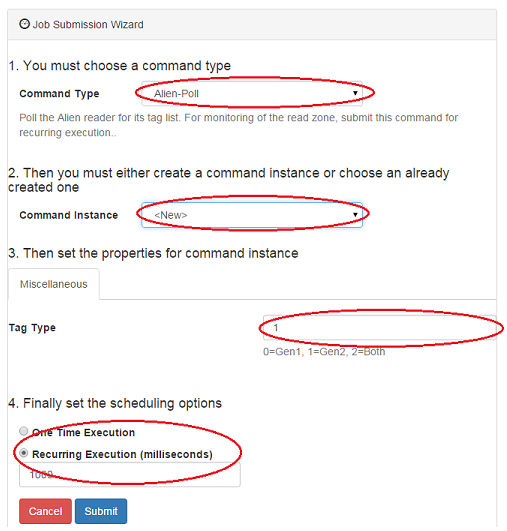
- Confirm the operation clicking on 'Submit Job' buton


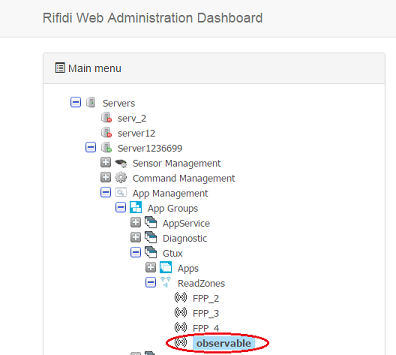
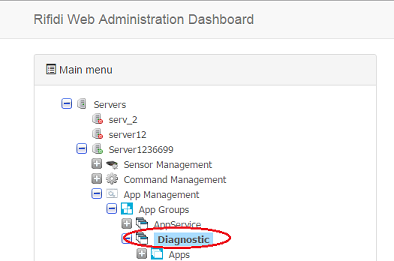
Application Management
Readzones
Get Readzones
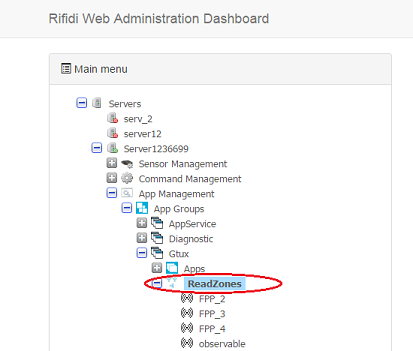
- Click on 'ReadZones' menu element and it will display the readzones belonging to parent application group

Add Readzone
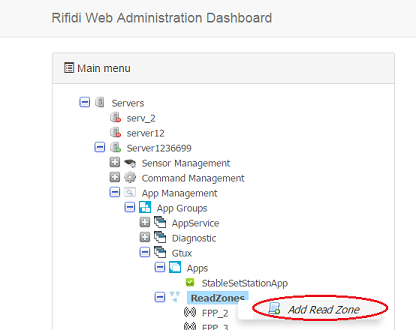
- Right click on 'ReadZones' node and then choose 'Add Read Zone'
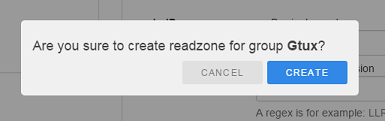
- Set the readzone name and readerID, and optionally provide the antennas, matchPattern and tagPattern, and click on 'Create' button
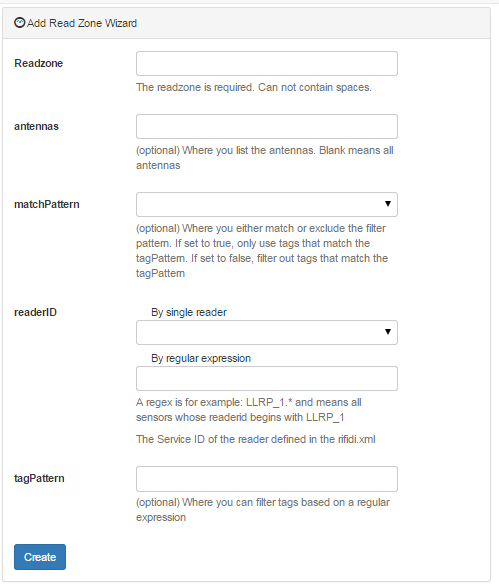
- Confirm the readzone creation operation


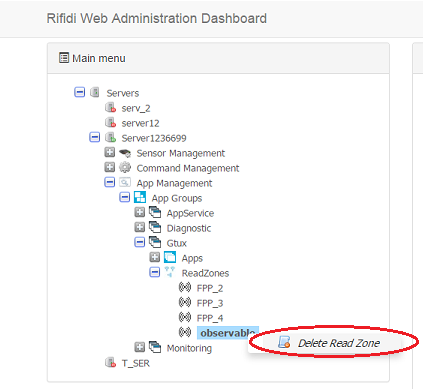
Delete Readzone
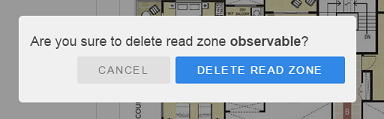
- Right click on readzone node to delete and then choose 'Delete Command Template'
- Confirm delete operation


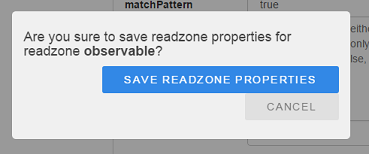
Update Readzone properties
- Click on readzone node to modify and then go to properties editor area
- Provide the values for readerID, and optionally provide the antennas, matchPattern and tagPattern attributes
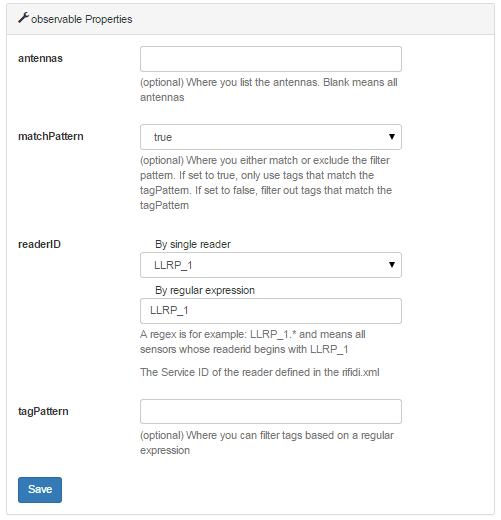
- Click on 'Save' button and confirm


Application Properties
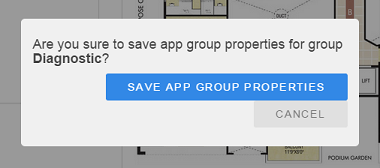
Get / Update Group Properties
- Click on application group node to get / update and then go to properties editor area
- Provide the values for application group properties and click on 'Save'
- Click on 'Save app group properties' button and confirm


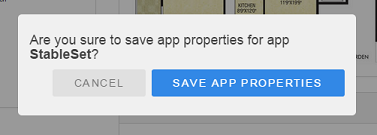
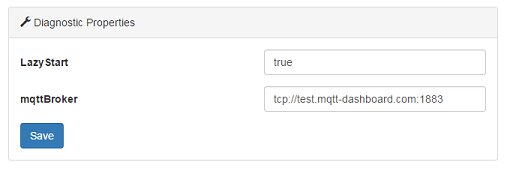
Get / Update Application Properties
- Click on application node to get / update and then go to properties editor area
- Provide the values for application properties and click on 'Save'
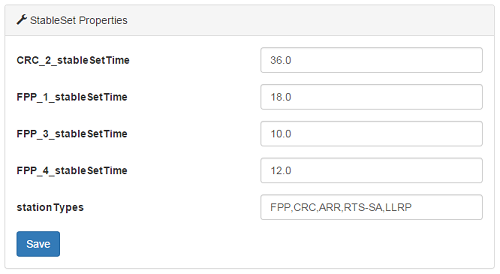
- Click on 'Save app properties' button and confirm