Difference between revisions of "Web Administration Dashboard"
From RifidiWiki
(→Add Server) |
(→Prerequisites for Managing Remote Rifidi Servers) |
||
| (100 intermediate revisions by 2 users not shown) | |||
| Line 1: | Line 1: | ||
| + | =Dashboard Vision/Roadmap= | ||
| + | |||
| + | The key components of the enterprise-wide dashboard we added with this release – and how they improve ease of use – are summarized below. | ||
| + | #Edge Server Node Management – Let’s you monitor multiple Rifidi Edge server nodes across the enterprise to see connection states, properties, sensors and applications. | ||
| + | #Sensor Management – Provides an interface to monitor sensors’ state, manage sensors’ properties and dynamically update sensors’ execution. | ||
| + | #Rifidi Application Management – Allows you to monitor application states, manage sensor/reader read zones, and update both out-of-the-box business solutions and custom (via SDK) Rifidi sensor/IoT device properties, providing the foundation for a Rifidi Application marketplace. | ||
=Introduction= | =Introduction= | ||
| − | The Web Administration Dashboard enables users to manage, monitor and configure Rifidi Servers and Applications. | + | The Web Administration Dashboard enables users to manage, monitor and configure Rifidi Servers, Sensors/Readers and Applications. |
| − | + | Go to http://localhost:8111/dashboard | |
| + | |||
| + | [[File:dashboard_sections.png]] | ||
| + | <br><br> | ||
| + | [[File:dashboard_wizard_section.png]] | ||
| + | |||
| + | |||
| + | ==Menu section== | ||
| + | The menu is a hierarchical tree component, where all the configured servers are listed, and under each server there are three fixed sections:<br> | ||
| + | #Sensor Management: Allows call operations related to sensors, such as listing sensors, create a new sensor connection, modify sensor properties, associate sessions to sensors, submit a command on a session | ||
| + | #Command Management: Allows create and delete command instances. | ||
| + | #App Management: Allows list the applications, start and stop them, modify application properties, group properties. It allows manage readzones, create, modify properties and delete. | ||
| + | |||
| + | ==Facility floor plan section== | ||
| + | It will be available in a future release | ||
| + | |||
| + | ==Wizard section== | ||
| + | When there is the need to create a component by using a wizard, it is displayed in wizard section. | ||
| + | |||
| + | ==Properties editor section== | ||
| + | When a tree element is selected then its properties are displayed in this section, offering the possibility to read or modify them | ||
=Server Management= | =Server Management= | ||
| − | == | + | ==Prerequisites for Managing Remote Rifidi Servers== |
| − | + | Due to browser security enhancements in order to use dashboard to manage remote Rifidi servers please follow these steps | |
| − | + | ||
| − | + | ||
| − | -- | + | 1. Update the following JVM argument in the Rifidi Sever startup script to use the external ip address in place of localhost/127.0.0.1 |
| + | <pre> | ||
| + | example: -Djava.rmi.server.hostname=192.168.86.58 where 192.168.86.58 is the External IP Address of the device | ||
| + | </pre> | ||
| + | 2. Configure the Rifidi servers to run via https/ssl with a trusted signed cert from a CA | ||
| + | <pre> | ||
| + | Steps for this can be found [[Edge_Management#Configuration_.28HTTP_over_SSL.29_-_Available_as_of_version_3.1.1|Rifidi Server Rest SSL Configuration]] | ||
| + | </pre> | ||
| − | + | 3. Go to dashboard using the ssl address: Example: https://192.168.86.58:8183/dashboard/#/ | |
| − | ---- | + | |
| − | [[File: | + | |
| + | Another less ideal option is to turn off the browser security. Here is an example on how to do so in Chrome. | ||
| + | |||
| + | "C:\Program Files (x86)\Google\Chrome\Application\chrome.exe" --disable-web-security --user-data-dir="c:/someFolderName" | ||
| + | |||
| + | ==Add Server== | ||
| + | Add a new server connection to rest services | ||
| + | # Right click on 'Servers' node and then choose 'Add server'<br>[[File:add_server_link.png]] | ||
| + | # Provide the values for attributes: Display name, IP address, protocol and port where rest services are deployed on that server.<br>[[File:add_server.png]] | ||
| + | # Click on 'Create' button and confirm<br>[[File:add_server_confirm2.png]] | ||
==Delete Server== | ==Delete Server== | ||
| + | Delete a server connection | ||
| + | # Right click on server node to delete and then choose 'Delete server'<br>[[File:delete_server_link.png]] | ||
| + | # Confirm delete operation<br>[[File:delete_server_confirm2.png]] | ||
| + | |||
==Update Server Connection Properties== | ==Update Server Connection Properties== | ||
| + | Update connection properties for server | ||
| + | # Click on server node to modify and then go to properties editor area<br>[[File:edit_server_link.png]] | ||
| + | # Provide the values for attributes: Display name, IP address, protocol and port where rest services are deployed on that server.<br>[[File:modify_server.png]] | ||
| + | # Click on 'Save' button and confirm<br>[[File:modify_server_confirm.png]] | ||
| + | |||
| + | ==Update Server Auto Refresh settings== | ||
| + | Enables or disables the menu auto refresh feature, so web app periodically synchronizes with server to reflect actual state of elements | ||
| + | # Click on servers node and then go to properties editor area<br>[[File:edit_servers_link.png]] | ||
| + | # Provide the values for attributes: Enable auto refresh and auto refresh delay.<br>[[File:modify_servers.png]] | ||
| + | # Click on 'Save' button and confirm<br>[[File:modify_servers_confirm.png]] | ||
| + | |||
| + | ==Save Server Configuration== | ||
| + | Save config changes made on this server | ||
| + | # Right click on server node and then choose 'Save server config'<br>[[File:save_server_link.png]] | ||
| + | # Confirm the save operation<br>[[File:save_server_confirm.png]] | ||
| + | |||
| + | ==Save all servers Configuration== | ||
| + | Save config changes made on all connected servers | ||
| + | # Right click on "Servers" node and then choose 'Save all servers config'<br>[[File:save_all_servers_link.png]] | ||
| + | # Confirm the save operation<br>[[File:save_all_servers_confirm.png]] | ||
| + | <!-- | ||
==Get/Set Server JVM Configuration== | ==Get/Set Server JVM Configuration== | ||
| Line 28: | Line 93: | ||
==Stop Server== | ==Stop Server== | ||
| + | |||
==Configure logging== | ==Configure logging== | ||
| Line 33: | Line 99: | ||
==Monitor Server via Jolokia == | ==Monitor Server via Jolokia == | ||
| − | + | leveraging edge monitoring Jolokia rest interface | |
| − | leveraging edge monitoring Jolokia rest interface | + | --> |
=Sensor Management= | =Sensor Management= | ||
| − | |||
===Add Sensor Wizard=== | ===Add Sensor Wizard=== | ||
| − | Steps user through creating sensor, session and command (where applicable). | + | Steps user through creating sensor, session and command (where applicable). |
| − | === | + | # Right click on 'Sensor Management' node and then choose 'Add Sensor'<br>[[File:add_sensor_link.png]] |
| + | # Choose the sensor type and optionally provide the reader id and click Next<br>[[File:add_sensor_readertype_selection.png]] | ||
| + | # Set the connection properties for sensor and optionally check if automatically start session, and click Next<br>[[File:add_sensor_set_sensor_properties.png]] | ||
| + | # Create the command for sensor, choose the command type and choose to create a new command instance or select an existing one, set the properties for command instance and set the scheduling options for executing command, and click Next<br>[[File:add_sensor_create_command.png]] | ||
| + | # Review steps summary and confirm<br>[[File:add_sensor_summary.png]] | ||
| + | |||
| + | ===Update Sensor Properties=== | ||
| + | Option to modify sensor properties | ||
| + | # Click on sensor node to modify and then go to properties editor area<br>[[File:edit_sensor_link.png]] | ||
| + | # Provide the values for sensor attributes<br>[[File:edit_sensor.png]] | ||
| + | # Click on 'Save sensor properties' button and confirm<br>[[File:edit_sensor_confirm.png]] | ||
===Delete Sensor=== | ===Delete Sensor=== | ||
| + | Option to delete a sensor connection | ||
| + | # Right click on sensor node to delete and then choose 'Delete Sensor'<br>[[File:delete_sensor_link.png]] | ||
| + | # Confirm delete operation<br>[[File:delete_sensor_confirm.png]] | ||
==Session== | ==Session== | ||
===Start Session=== | ===Start Session=== | ||
| + | To start a session on sensor | ||
| + | # Click on session node to start and then click on 'Start Session'<br>[[File:start_session_link.png]] | ||
===Stop Session=== | ===Stop Session=== | ||
| + | To stop a session on sensor | ||
| + | # Click on session node to stop and then click on 'Stop Session'<br>[[File:stop_session_link.png]] | ||
==Commands== | ==Commands== | ||
| − | === | + | ===Update Command properties=== |
| + | Allows the updating of properties for a command | ||
| + | # Click on command instance node to modify and then go to properties editor area<br>[[File:edit_command_link.png]] | ||
| + | # Provide the values for command attributes<br>[[File:edit_command.png]] | ||
| + | # Click on 'Save' button and confirm<br>[[File:edit_command_confirm.png]] | ||
| + | |||
===Deleted Command=== | ===Deleted Command=== | ||
| − | === | + | Deletes a command template |
| + | # Right click on command node to delete and then choose 'Delete Command Template'<br>[[File:delete_command_link.png]] | ||
| + | # Confirm delete operation<br>[[File:delete_command_confirm.png]] | ||
| + | |||
| + | ===Create Command=== | ||
| + | Creates a command template | ||
| + | # Right click on command type node, select 'Create Command Template' and then go to properties editor area<br>[[File:create_command_link.png]] | ||
| + | # Provide the values for command attributes<br>[[File:create_command.png]] | ||
| + | # Click on 'Create' button and confirm<br>[[File:create_command_confirm.png]] | ||
| + | |||
===Execute Command=== | ===Execute Command=== | ||
| + | Executes a command on a session | ||
| + | # Right click on session element where you want to submit the job and then choose 'Submit Job'<br>[[File:execute_command_link.png]] | ||
| + | # Choose the command type and choose to create a new command instance or select an existing one, set the properties for command instance and set the scheduling options for executing command, and click Submit<br>[[File:execute_command.png]] | ||
| + | # Confirm the operation clicking on 'Submit Job' buton <br>[[File:execute_command_confirm.png]] | ||
| + | <!-- | ||
==LLRP== | ==LLRP== | ||
===Add Reader Configuarions=== | ===Add Reader Configuarions=== | ||
| Line 65: | Line 166: | ||
===Update RoSpec=== | ===Update RoSpec=== | ||
===Delete RoSpec=== | ===Delete RoSpec=== | ||
| + | --> | ||
| + | <!-- | ||
==Diagnostic== | ==Diagnostic== | ||
===View Current Tags on a Sensor=== | ===View Current Tags on a Sensor=== | ||
| + | --> | ||
| + | <!-- | ||
==Management== | ==Management== | ||
===Map on Floor Plan (Overlay Google Maps=== | ===Map on Floor Plan (Overlay Google Maps=== | ||
| + | --> | ||
=Application Management= | =Application Management= | ||
| + | <!-- | ||
==Rifidi Applications== | ==Rifidi Applications== | ||
===Add Application=== | ===Add Application=== | ||
===Update Application=== | ===Update Application=== | ||
===Remove Application=== | ===Remove Application=== | ||
| + | --> | ||
==Readzones== | ==Readzones== | ||
===Get Readzones=== | ===Get Readzones=== | ||
| + | Option to list the readzones associated with an application group | ||
| + | # Click on 'ReadZones' menu element and it will display the readzones belonging to parent application group<br>[[File:readzones_link.png]] | ||
| + | |||
===Add Readzone=== | ===Add Readzone=== | ||
| − | + | To add a readzone definition associated with an application group | |
| − | + | # Right click on 'ReadZones' node and then choose 'Add Read Zone'<br>[[File:add_readzone_link.png]] | |
| + | # Set the readzone name and readerID, and optionally provide the antennas, matchPattern and tagPattern, and click on 'Create' button<br>[[File:add_readzone.png]] | ||
| + | # Confirm the readzone creation operation<br>[[File:add_readzone_confirm.png]] | ||
| − | == | + | ===Delete Readzone=== |
| − | ===Get Group | + | Deletes a readzone definition |
| + | # Right click on readzone node to delete and then choose 'Delete Command Template'<br>[[File:delete_readzone_link.png]] | ||
| + | # Confirm delete operation<br>[[File:delete_readzone_confirm.png]] | ||
| + | |||
| + | ===Update Readzone properties=== | ||
| + | Updates the properties for a readzone | ||
| + | # Click on readzone node to modify and then go to properties editor area<br>[[File:update_readzone_link.png]] | ||
| + | # Provide the values for readerID, and optionally provide the antennas, matchPattern and tagPattern attributes<br>[[File:update_readzone.png]] | ||
| + | # Click on 'Save' button and confirm<br>[[File:update_readzone_confirm.png]] | ||
| + | |||
| + | ==Application Properties== | ||
| + | ===Get / Update Group Properties=== | ||
| + | List and modify the application group properties | ||
| + | # Click on application group node to get / update and then go to properties editor area<br>[[File:update_groupproperties_link.png]] | ||
| + | # Provide the values for application group properties and click on 'Save'<br>[[File:update_groupproperties.png]] | ||
| + | # Click on 'Save app group properties' button and confirm<br>[[File:update_groupproperties_confirm.png]] | ||
| + | |||
| + | |||
| + | <!-- | ||
===Add Group Properties=== | ===Add Group Properties=== | ||
===Delete Group Properties=== | ===Delete Group Properties=== | ||
===Update Group Properties=== | ===Update Group Properties=== | ||
| − | ===Get Application | + | --> |
| + | |||
| + | ===Get / Update Application Properties=== | ||
| + | List and modify the application properties | ||
| + | # Click on application node to get / update and then go to properties editor area<br>[[File:update_appproperties_link.png]] | ||
| + | # Provide the values for application properties and click on 'Save'<br>[[File:update_appproperties.png]] | ||
| + | # Click on 'Save app properties' button and confirm<br>[[File:update_appproperties_confirm.png]] | ||
| + | |||
| + | <!-- | ||
===Add Application Properties=== | ===Add Application Properties=== | ||
===Delete Application Properties=== | ===Delete Application Properties=== | ||
===Update Application Properties=== | ===Update Application Properties=== | ||
| + | --> | ||
| + | =Diagnostic= | ||
| + | ==Current Tags View== | ||
| + | # Right click on reader/sensor name <br>[[File:Currenttagsmenu.png]] | ||
| + | # Click on Current tags to view tags on reader <br>[[File:Currenttagsview.png]] | ||
Latest revision as of 12:58, 31 December 2020
Contents
Dashboard Vision/Roadmap
The key components of the enterprise-wide dashboard we added with this release – and how they improve ease of use – are summarized below.
- Edge Server Node Management – Let’s you monitor multiple Rifidi Edge server nodes across the enterprise to see connection states, properties, sensors and applications.
- Sensor Management – Provides an interface to monitor sensors’ state, manage sensors’ properties and dynamically update sensors’ execution.
- Rifidi Application Management – Allows you to monitor application states, manage sensor/reader read zones, and update both out-of-the-box business solutions and custom (via SDK) Rifidi sensor/IoT device properties, providing the foundation for a Rifidi Application marketplace.
Introduction
The Web Administration Dashboard enables users to manage, monitor and configure Rifidi Servers, Sensors/Readers and Applications.
Go to http://localhost:8111/dashboard


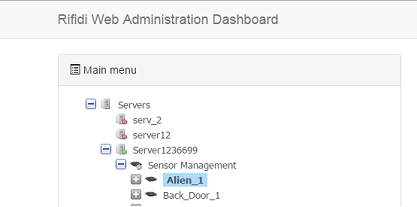
Menu section
The menu is a hierarchical tree component, where all the configured servers are listed, and under each server there are three fixed sections:
- Sensor Management: Allows call operations related to sensors, such as listing sensors, create a new sensor connection, modify sensor properties, associate sessions to sensors, submit a command on a session
- Command Management: Allows create and delete command instances.
- App Management: Allows list the applications, start and stop them, modify application properties, group properties. It allows manage readzones, create, modify properties and delete.
Facility floor plan section
It will be available in a future release
Wizard section
When there is the need to create a component by using a wizard, it is displayed in wizard section.
Properties editor section
When a tree element is selected then its properties are displayed in this section, offering the possibility to read or modify them
Server Management
Prerequisites for Managing Remote Rifidi Servers
Due to browser security enhancements in order to use dashboard to manage remote Rifidi servers please follow these steps
1. Update the following JVM argument in the Rifidi Sever startup script to use the external ip address in place of localhost/127.0.0.1
example: -Djava.rmi.server.hostname=192.168.86.58 where 192.168.86.58 is the External IP Address of the device
2. Configure the Rifidi servers to run via https/ssl with a trusted signed cert from a CA
Steps for this can be found [[Edge_Management#Configuration_.28HTTP_over_SSL.29_-_Available_as_of_version_3.1.1|Rifidi Server Rest SSL Configuration]]
3. Go to dashboard using the ssl address: Example: https://192.168.86.58:8183/dashboard/#/
Another less ideal option is to turn off the browser security. Here is an example on how to do so in Chrome.
"C:\Program Files (x86)\Google\Chrome\Application\chrome.exe" --disable-web-security --user-data-dir="c:/someFolderName"
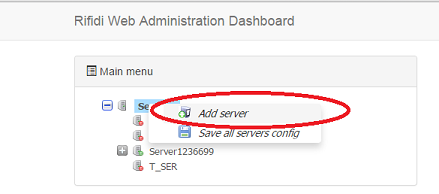
Add Server
Add a new server connection to rest services
- Right click on 'Servers' node and then choose 'Add server'
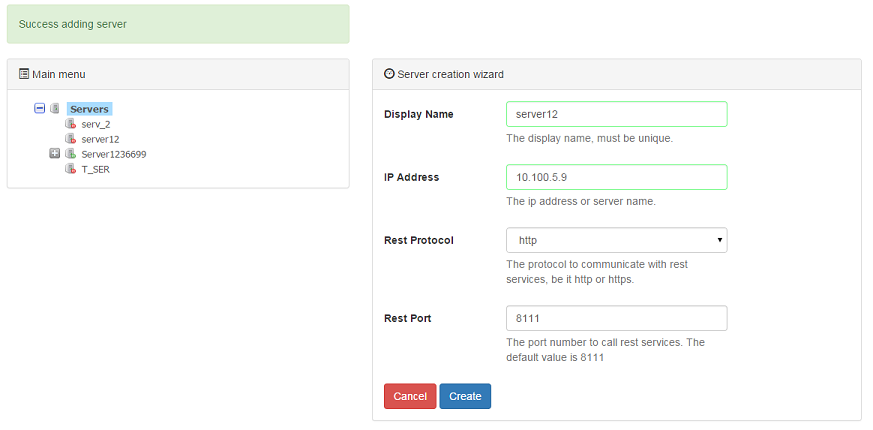
- Provide the values for attributes: Display name, IP address, protocol and port where rest services are deployed on that server.
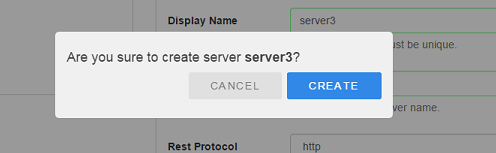
- Click on 'Create' button and confirm


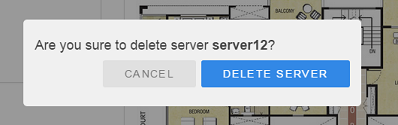
Delete Server
Delete a server connection
- Right click on server node to delete and then choose 'Delete server'
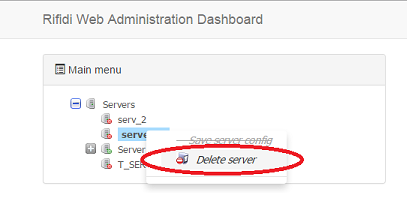
- Confirm delete operation


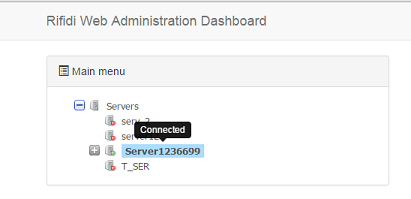
Update Server Connection Properties
Update connection properties for server
- Click on server node to modify and then go to properties editor area
- Provide the values for attributes: Display name, IP address, protocol and port where rest services are deployed on that server.
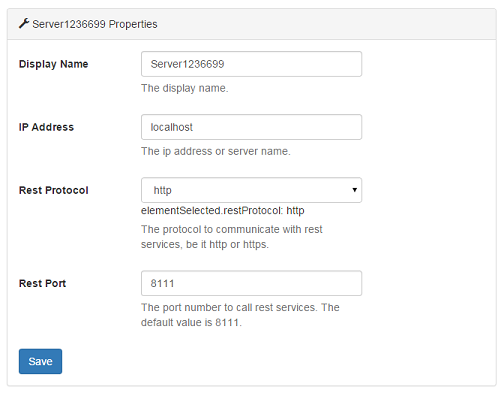
- Click on 'Save' button and confirm


Update Server Auto Refresh settings
Enables or disables the menu auto refresh feature, so web app periodically synchronizes with server to reflect actual state of elements
- Click on servers node and then go to properties editor area
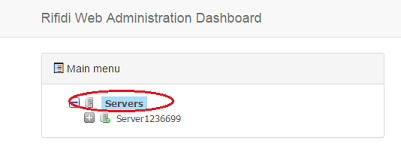
- Provide the values for attributes: Enable auto refresh and auto refresh delay.
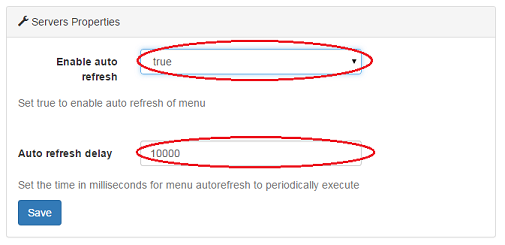
- Click on 'Save' button and confirm


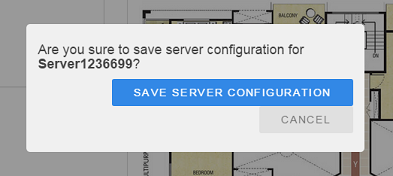
Save Server Configuration
Save config changes made on this server
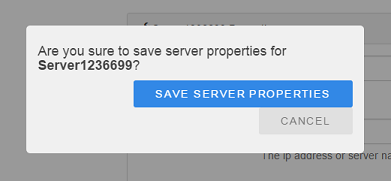
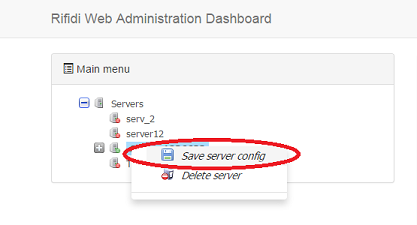
- Right click on server node and then choose 'Save server config'
- Confirm the save operation


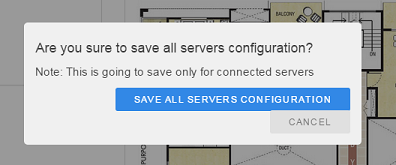
Save all servers Configuration
Save config changes made on all connected servers
- Right click on "Servers" node and then choose 'Save all servers config'
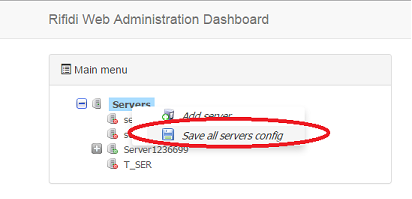
- Confirm the save operation


Sensor Management
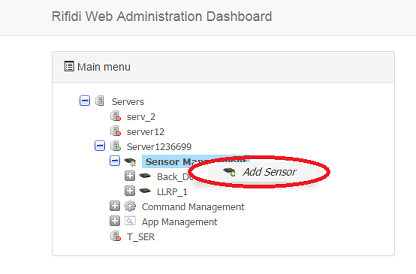
Add Sensor Wizard
Steps user through creating sensor, session and command (where applicable).
- Right click on 'Sensor Management' node and then choose 'Add Sensor'
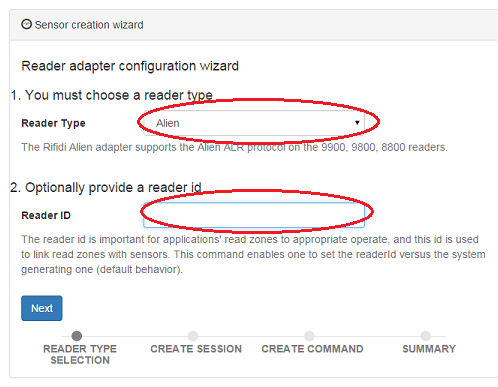
- Choose the sensor type and optionally provide the reader id and click Next
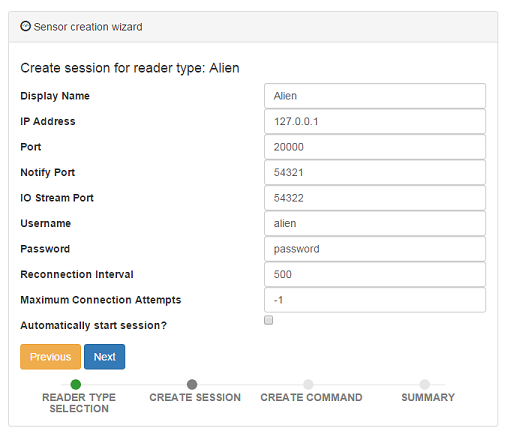
- Set the connection properties for sensor and optionally check if automatically start session, and click Next
- Create the command for sensor, choose the command type and choose to create a new command instance or select an existing one, set the properties for command instance and set the scheduling options for executing command, and click Next

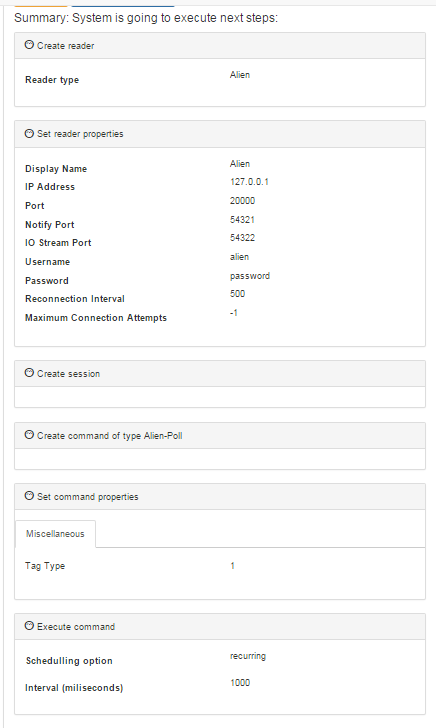
- Review steps summary and confirm


Update Sensor Properties
Option to modify sensor properties
- Click on sensor node to modify and then go to properties editor area
- Provide the values for sensor attributes
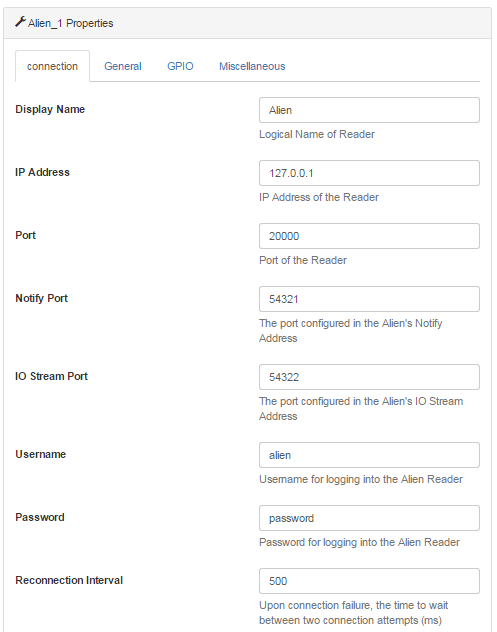
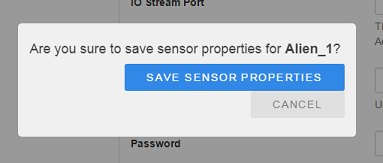
- Click on 'Save sensor properties' button and confirm


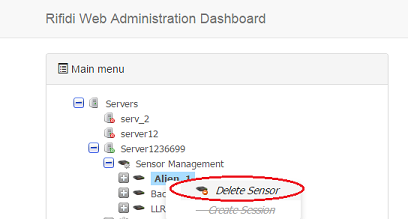
Delete Sensor
Option to delete a sensor connection
- Right click on sensor node to delete and then choose 'Delete Sensor'
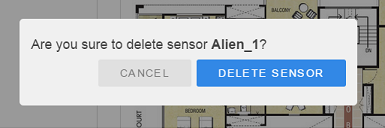
- Confirm delete operation


Session
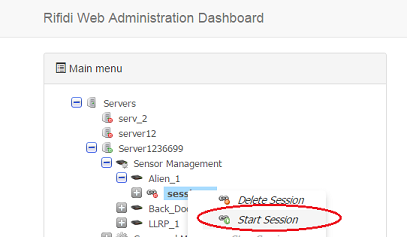
Start Session
To start a session on sensor
- Click on session node to start and then click on 'Start Session'

Stop Session
To stop a session on sensor
- Click on session node to stop and then click on 'Stop Session'


Commands
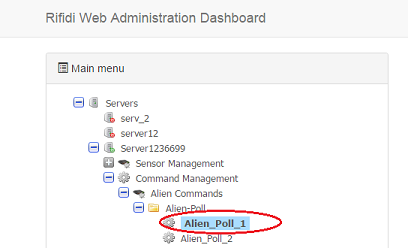
Update Command properties
Allows the updating of properties for a command
- Click on command instance node to modify and then go to properties editor area
- Provide the values for command attributes
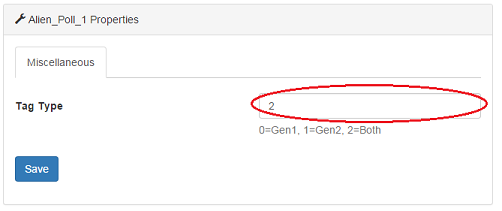
- Click on 'Save' button and confirm


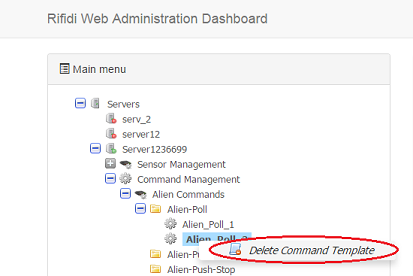
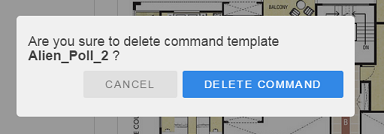
Deleted Command
Deletes a command template
- Right click on command node to delete and then choose 'Delete Command Template'
- Confirm delete operation


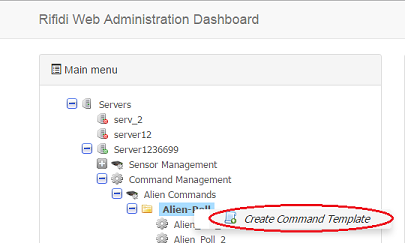
Create Command
Creates a command template
- Right click on command type node, select 'Create Command Template' and then go to properties editor area
- Provide the values for command attributes
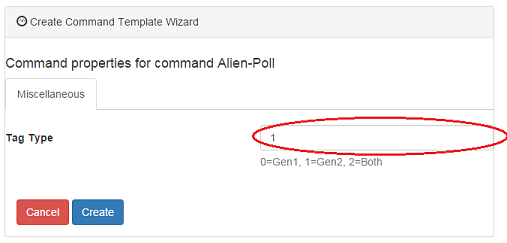
- Click on 'Create' button and confirm


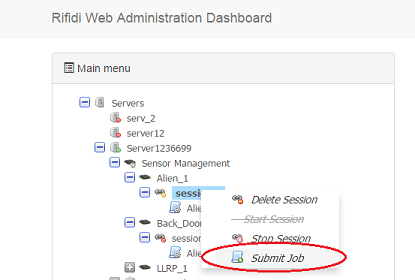
Execute Command
Executes a command on a session
- Right click on session element where you want to submit the job and then choose 'Submit Job'
- Choose the command type and choose to create a new command instance or select an existing one, set the properties for command instance and set the scheduling options for executing command, and click Submit
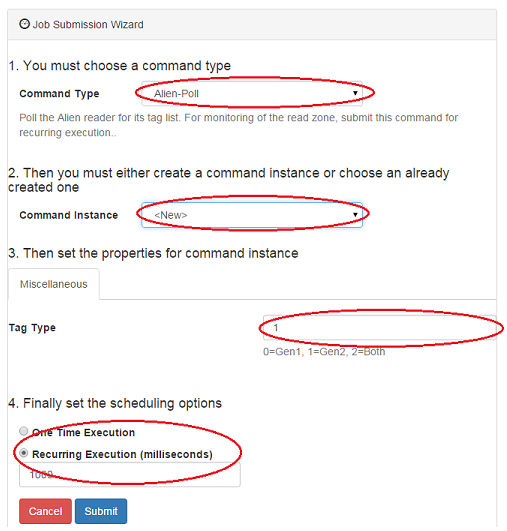
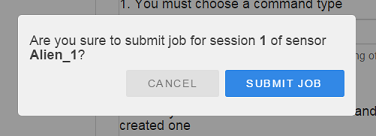
- Confirm the operation clicking on 'Submit Job' buton


Application Management
Readzones
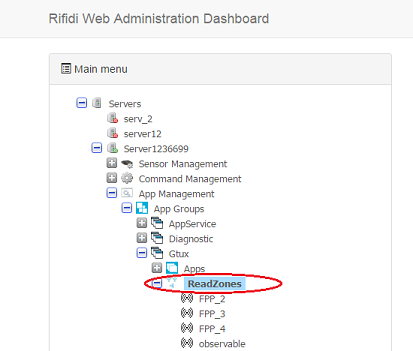
Get Readzones
Option to list the readzones associated with an application group
- Click on 'ReadZones' menu element and it will display the readzones belonging to parent application group

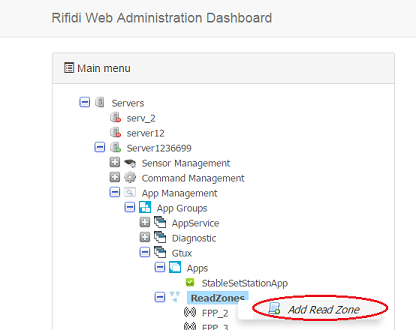
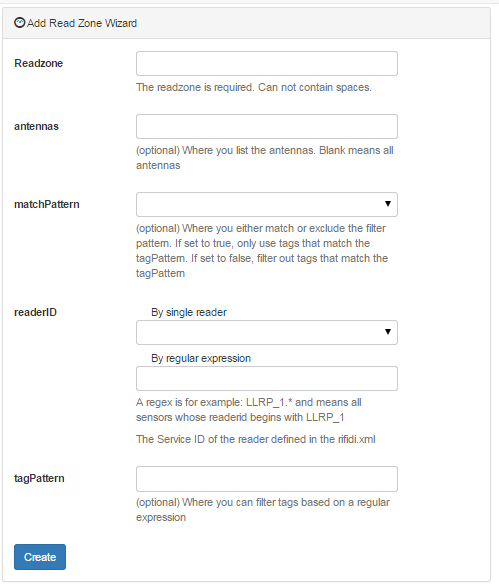
Add Readzone
To add a readzone definition associated with an application group
- Right click on 'ReadZones' node and then choose 'Add Read Zone'
- Set the readzone name and readerID, and optionally provide the antennas, matchPattern and tagPattern, and click on 'Create' button
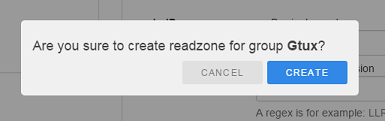
- Confirm the readzone creation operation


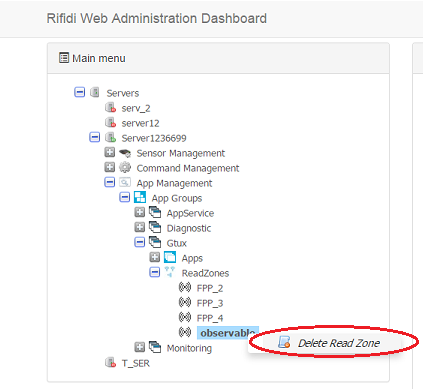
Delete Readzone
Deletes a readzone definition
- Right click on readzone node to delete and then choose 'Delete Command Template'
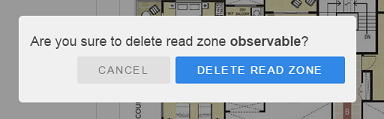
- Confirm delete operation


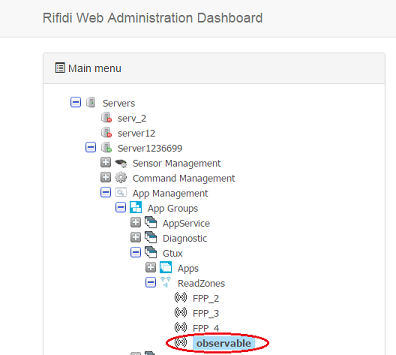
Update Readzone properties
Updates the properties for a readzone
- Click on readzone node to modify and then go to properties editor area
- Provide the values for readerID, and optionally provide the antennas, matchPattern and tagPattern attributes
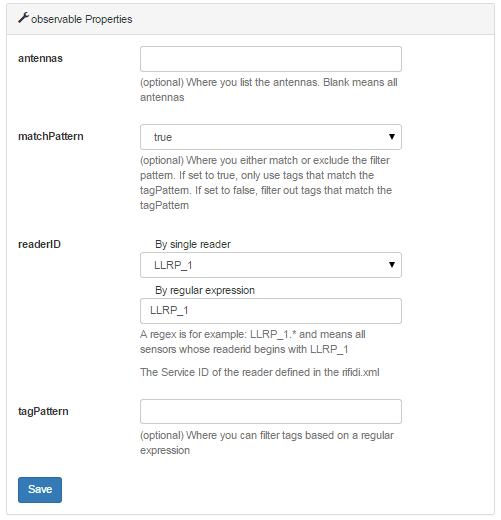
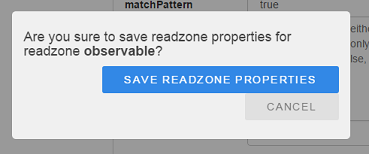
- Click on 'Save' button and confirm


Application Properties
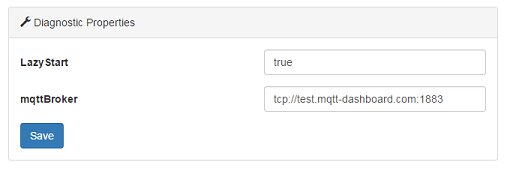
Get / Update Group Properties
List and modify the application group properties
- Click on application group node to get / update and then go to properties editor area
- Provide the values for application group properties and click on 'Save'
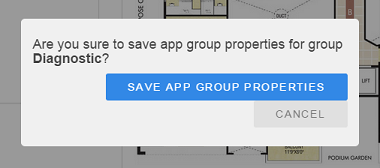
- Click on 'Save app group properties' button and confirm


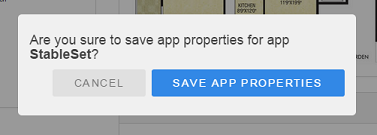
Get / Update Application Properties
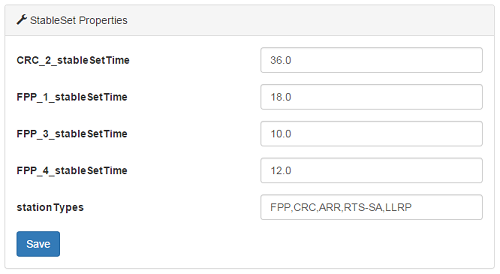
List and modify the application properties
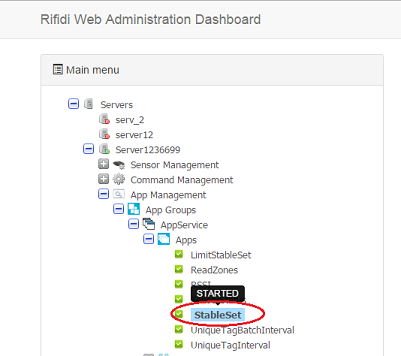
- Click on application node to get / update and then go to properties editor area
- Provide the values for application properties and click on 'Save'
- Click on 'Save app properties' button and confirm


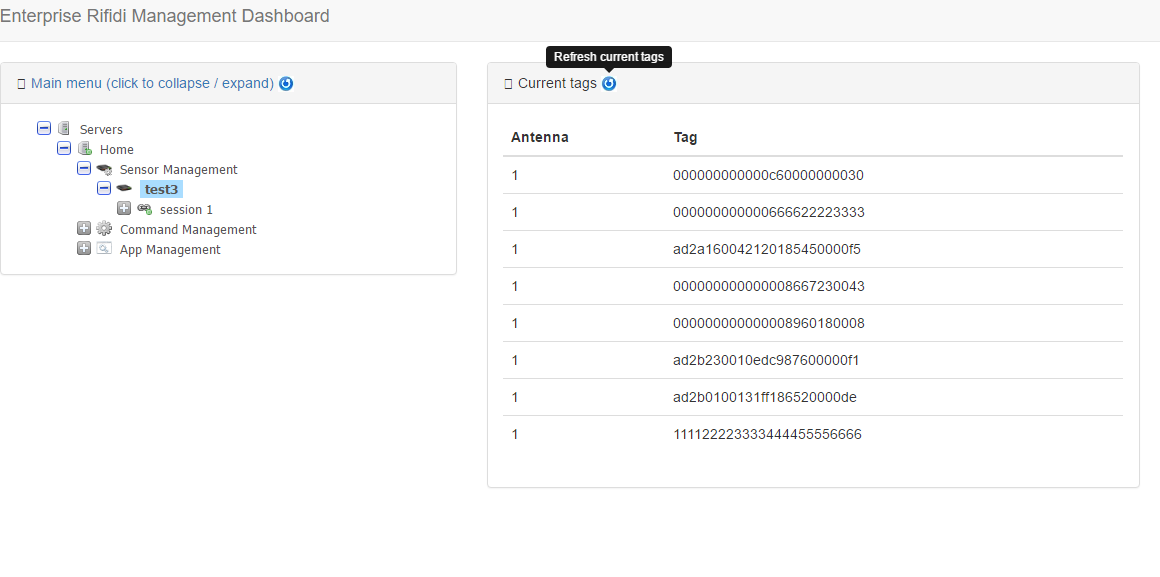
Diagnostic
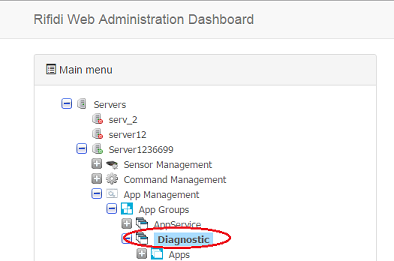
Current Tags View
- Right click on reader/sensor name

- Click on Current tags to view tags on reader